
Uuendatud 28. september 2026
How to configure Dashboard Indicators in Excellent Portal?
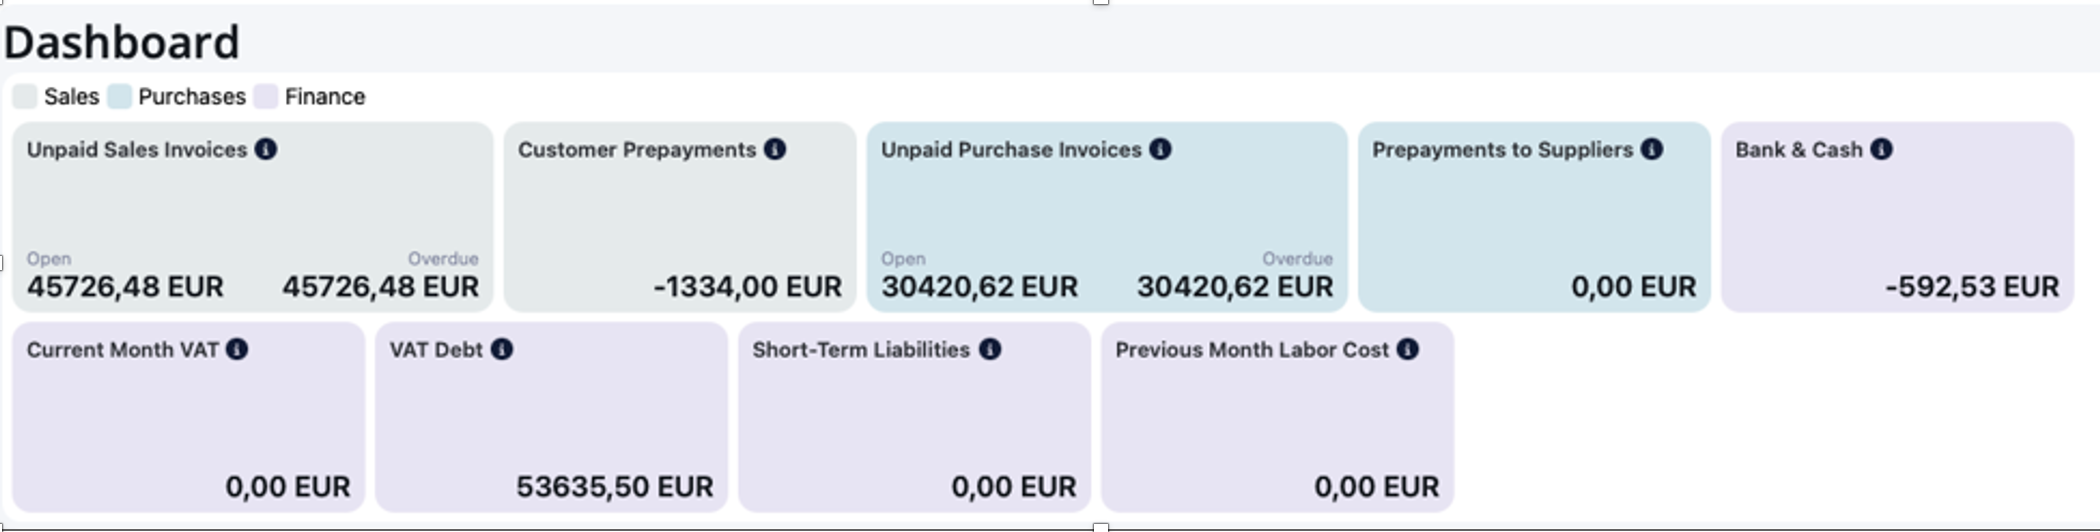
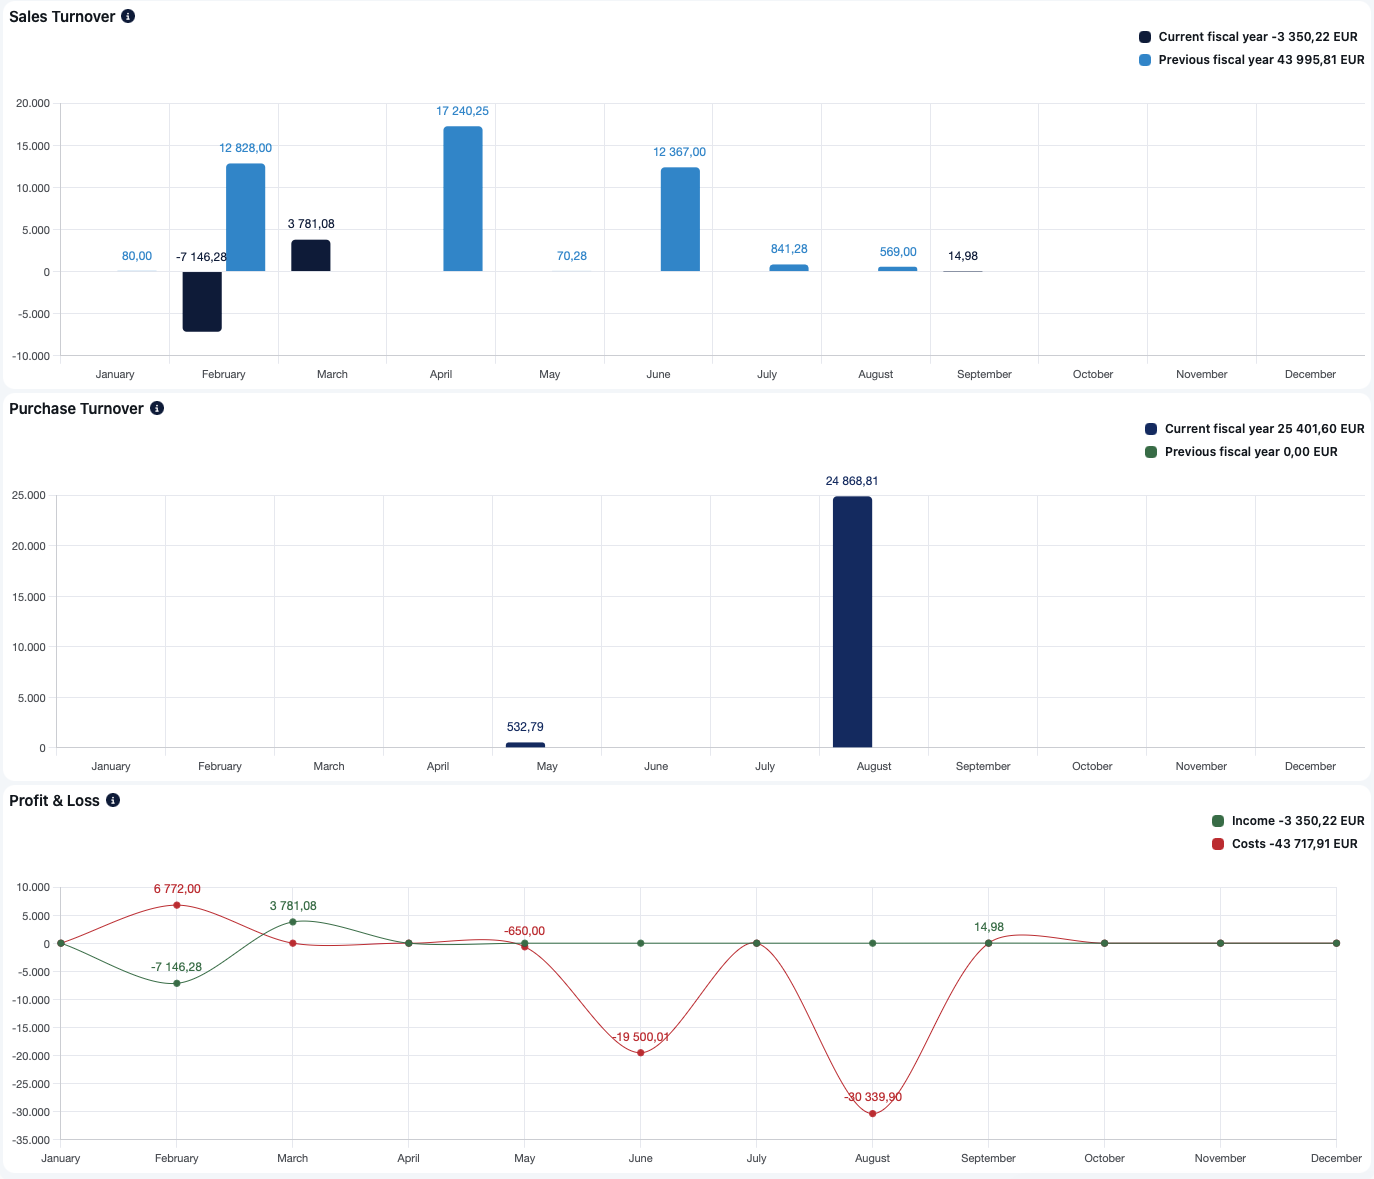
The Dashboard in Excellent Portal provides a quick and visual overview of the company’s financial situation, including sales, purchases, and financial indicators. The data in all widgets and graphs is refreshed automatically every 3 minutes after the KPI records required for Excellent Portal have been created (see section 3 below).
This guide covers:
1) SELECTING DASHBOARD INDICATORS.
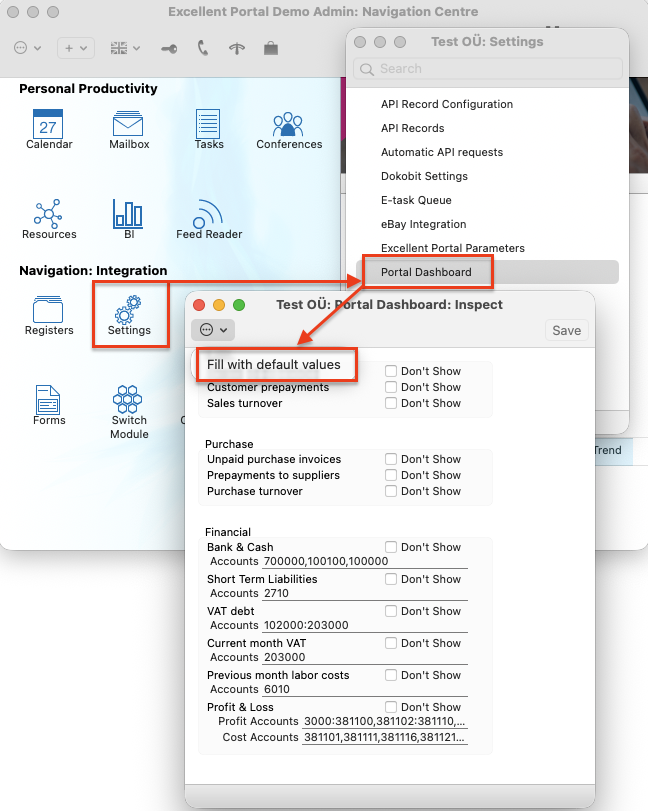
To configure the Dashboard indicators, navigate in Books to module Integration > Settings > “Portal Dashboard“. If Excellent Portal has not been activated, the settings window cannot be edited.
You see following widgets and graphs list:
Sales
- Unpaid sales invoices (widget)
- Customer prepayments (widget)
- Sales turnover (graph)
Purchase
- Unpaid purchase invoices (widget)
- Prepayments to suppliers (widget)
- Purchase turnover (graph)
Finance
- Bank & Cash (widget)
- Current month VAT (widget)
- VAT debt (widget)
- Short-term liabilities (widget)
- Previous month labor costs (widget)
- Profit & Loss (graph)
If you do not want a particular widget or graph to be displayed to users in Excellent Portal, select “Don’t Show” on the corresponding row.
2) FILLING IN ACCOUNTS.
In the “Portal Dashboard” settings window, open the Operations menu and select “Fill with default values”. The system automatically fills in accounts for those financial widgets and graphs where suitable accounts can be identified based on the existing settings. After the accounts have been filled in automatically, review all financial indicators:
- Modify or add to the automatically detected accounts if necessary.
- Add accounts manually for indicators where the system did not find suitable accounts.
- If the “Accounts” field is left empty, the indicator is still displayed in Excellent Portal, but it is shown as not configured.
Entering accounts manually:
Accounts can be selected in the “Accounts” field using Ctrl+Enter. You can enter several accounts separated by commas or enter an account range using a colon. For example: 1000,1030,1040:1050
In this case, the result includes account 1000, account 1030, and the accounts from 1040 to 1050.
3) SAVING THE SETTING AND CREATING KPI RECORDS.
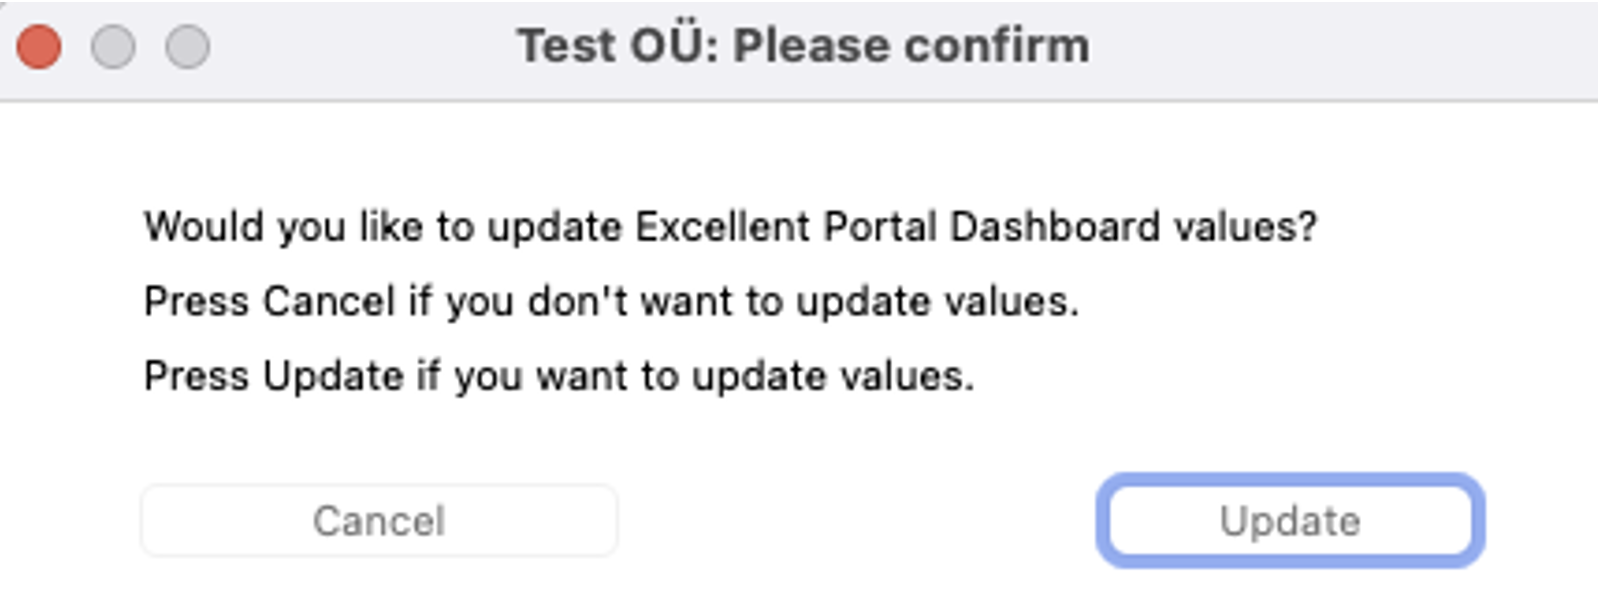
When all selections have been configured, Save the settings. A confirmation message is displayed: “Would you like to update Excellent Portal Dashboard values?” Click “Update”.
Excellent Portal widgets and graphs use KPI records created in Excellent Books in module “System” > Settings > “KPI-s“. These records do not need to be created manually. When you click “Update”, Excellent Books automatically creates the KPI records required for the Excellent Portal Dashboard based on the “Portal Dashboard” settings.
If no changes have been made in the “Portal Dashboard” settings, the confirmation message may not appear. In that case, new KPI records are not created either. To force creating the KPI records, make at least one change in “Portal Dashboard” settings. For example, select “Don’t Show” at least for one indicator and then unselect the same selection again. Save the settings and click “Update” in the confirmation window.
Note: The KPI records are created immediately, but their values are calculated in the background. The first values appear in Excellent Portal within a few minutes, and the complete Dashboard view may take up to 10 minutes to update. After that, Dashboard data is refreshed every 3 minutes.
When you click “Update”, the KPI records used by Excellent Portal are recreated based on the current “Portal Dashboard” settings and the previous Portal KPI records are overwritten. This does not affect KPI records that users have created manually in Excellent Books directly to “System” > Settings > “KPI-s”.
4) RESTRICTING DASHBOARD VISIBILITY IN EXCELLENT PORTAL.
Dashboard visibility depends on Portal user rights:
- If a user has permission to view sales invoices, sales-related widgets and graph will be displayed.
- If a user has permission to view purchase invoices, purchase widgets and graph will be displayed.
- If a user has permission to view financial reports such as the Balance Sheet, financial widgets and graph will be displayed.
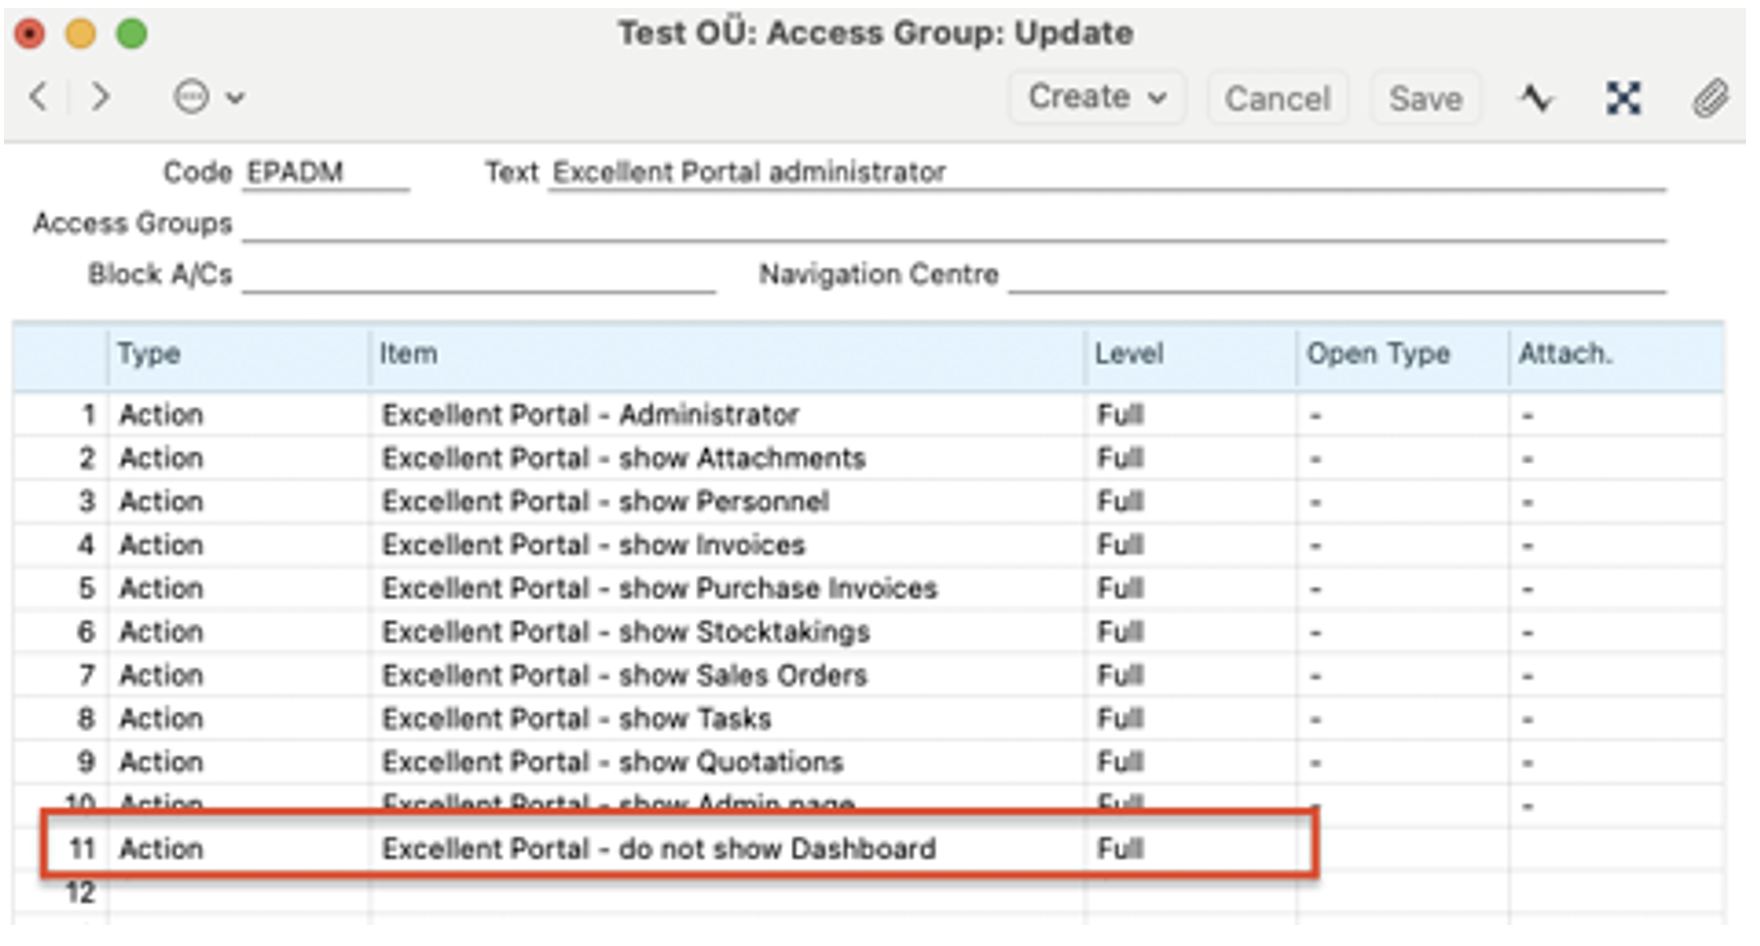
You can also hide the entire Dashboard page from selected users through their assigned Access Group in Excellent Books.
To do this, open in Books module System > Settings > “Access Groups”.
Find the appropriate group and add the right:
- Type = Action
- Action = “Excellent Portal – do not show Dashboard”
- Level = Full
When this setting is enabled, the Dashboard page in Portal will not be visible to any users assigned to that access group.
Sind võivad huvitada ka need artiklid:
Kuidas seadistada näidikuid Excellent Portalis?
How to Activate and Configure Two-Factor Authentication (2FA) in Excellent Portal?